In the past tutorials, we’ve looked at ways to remove vocals from music. Today, we explore the opposite – how to isolate vocals from any song and create an acapella vocal track that you can use for remixes and music production.
In this guide, we share and compare 3 methods to make acapellas, including using PhonicMind, our acapella maker. But first, what's an acapella?
‘A capella’ is Italian for ‘in the style of the chapel’ – which directly means a performance by a singer or group, without an accompaniment. You could call it a vocal solo.
While acapella originally means performance without accompaniment, these days they are usually referred to as vocal-only tracks. Acapella tracks became popular back during the days of vinyl records, where some albums included acapella versions. DJs and music producers started using them for live mixing, remixes, and producing music.
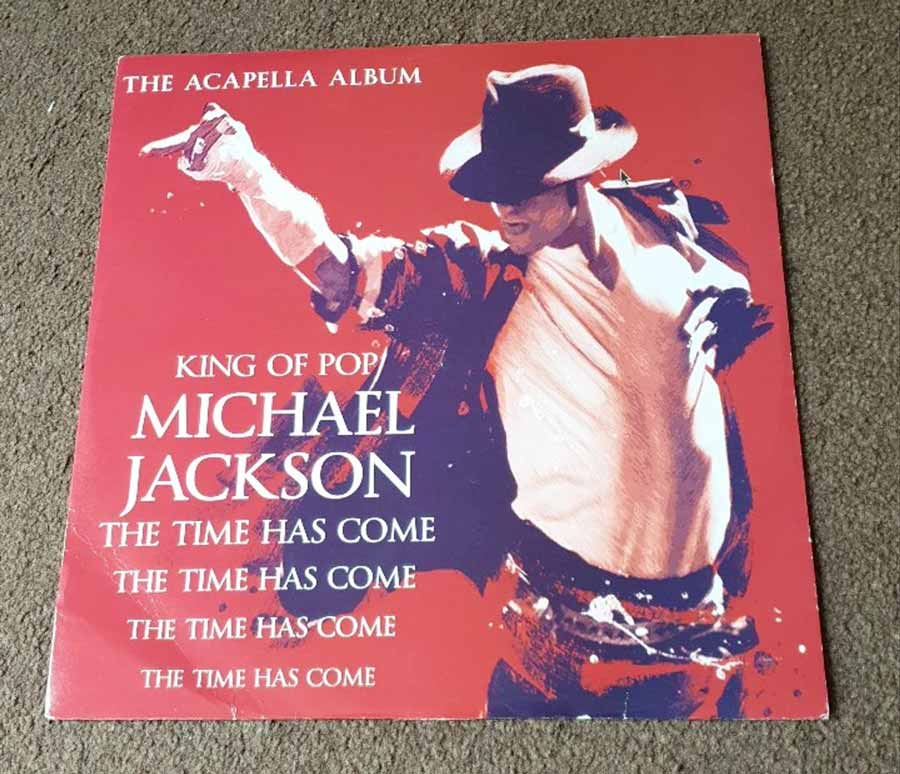
A classic DJ remix is to find an acapella version of a popular song and layer it over an instrumental track of another song – effectively creating a remix. This became popularly known as a ‘bootleg’ remix or DJ mash-up.
And the reason DJs do this? Not only it brings a lot of fun, but it also gives them the benefit of getting more plays on their remixes, especially if they remix a popular song – that has a large listener base.
Although today we have the technology to make acapella vocals from any song, this doesn’t mean we’re invincible to the law.
Generally, you won’t get into trouble for using an unlicensed acapella during a live DJ performance for a private party or personal use. The truth is record labels don’t have the time to track down every DJ or producer using their samples.
However, if you’re planning to commercialize and distribute songs that use acapella samples that do not belong to you, then it’s advisable to it’s best to look into getting a Master Use or a Mechanical License from the copyright holder.
Now that you know what acapellas are and understand the fundamentals, let’s get into the process of making acapella vocal tracks from any song.
In this post, I’ll show you three methods to making acapellas from songs.
The first method is to use Audacity’s voice isolation effect. The effect works by attempting to remove center-panned audio from a song, simply because most songs have their acapella vocals mixed in the middle.
The second method is to use a phase-cancelation technique, where we make use of an instrumental track to attenuate the accompaniment in an original song, leaving us the vocals.
If you prefer to get great-sounding acapellas in just minutes, without having to manually process them, skip over to the third method – using PhonicMind, our AI vocal remover which also works as an online acapella maker, that uses artificial intelligence for its audio engine to isolate vocals from any song.
Let’s get started.
Audacity is an open-source audio editing tool that works on Mac and PC. Once you have installed it on your computer, let’s begin.
I’m using the song Take Me Away by Studio Monkey for the tutorials in the post.
Got a song you want to make an acapella from? If so, just drop the original song into Audacity and have it loaded as a track.
Audacity works with many different audio formats, however since we’re isolating vocals from a song, it’s recommended to use an uncompressed audio file in .wav, .aiff or .flac format.
We’re going to use the Vocal Reduction and Isolation effect in Audacity to isolate the vocals in the song, turning them into acapellas.
Select the entire track, then load the effect. You’ll find the Vocal Reduction and Isolation effect under the effects drop bar.
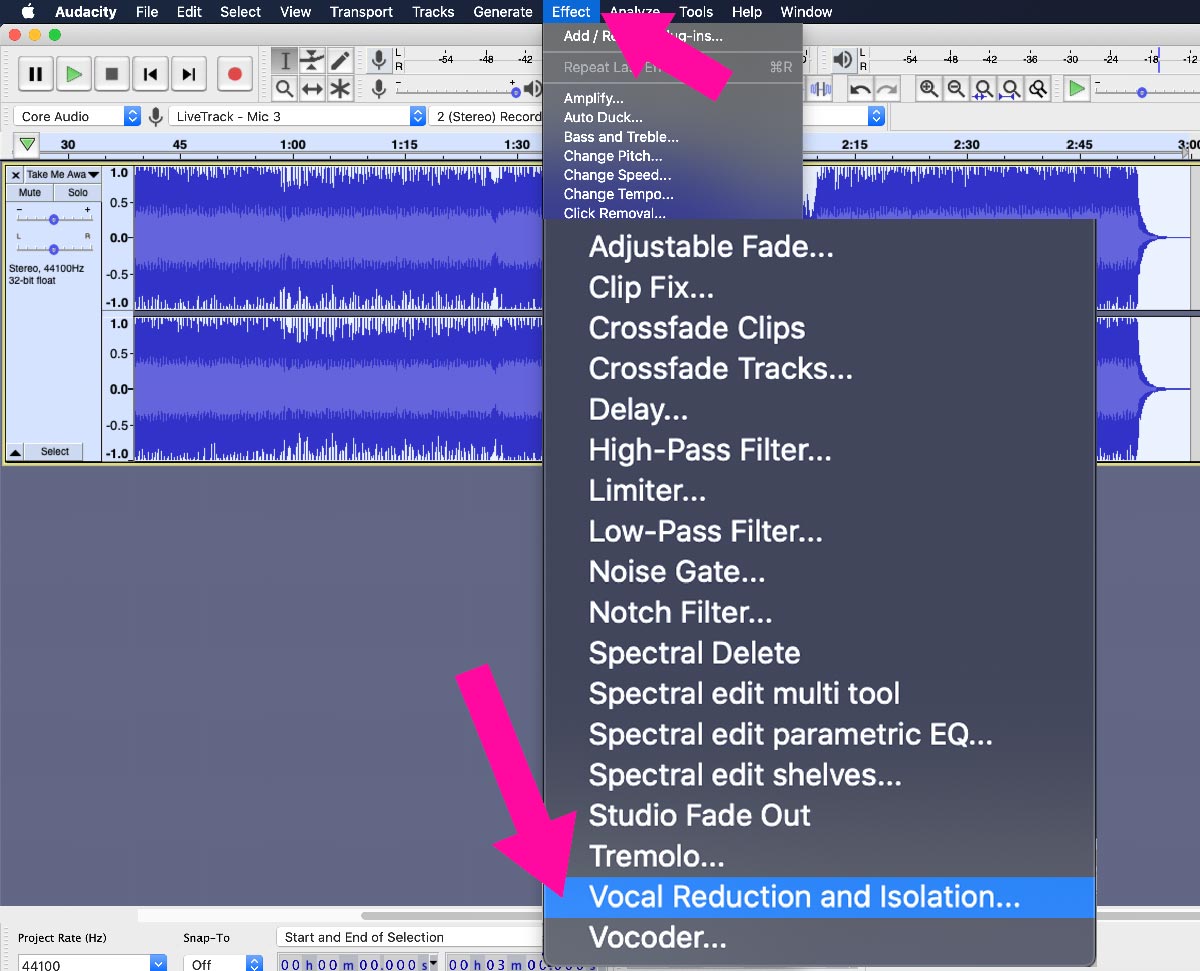
Under ‘Action’, choose ‘Isolate Vocals’. Choosing this option means the effect will extract the defined vocal range (from the center of the track) that you set in frequencies below and then return it as a dual-mono track.
The strength slider determines how steep the frequency band is at the center of the track. A low-strength setting means only the extreme left and rights will be removed. This usually means more of the background accompaniment to leak in.
A high-strength setting, on the other hand, means most of the sides will be removed. However, this also introduces more audio artifacts in the isolated vocals.
Finally, the two remaining sliders – Low Cut for Vocals and High Cut for Vocals, determine the frequency range that will be removed.
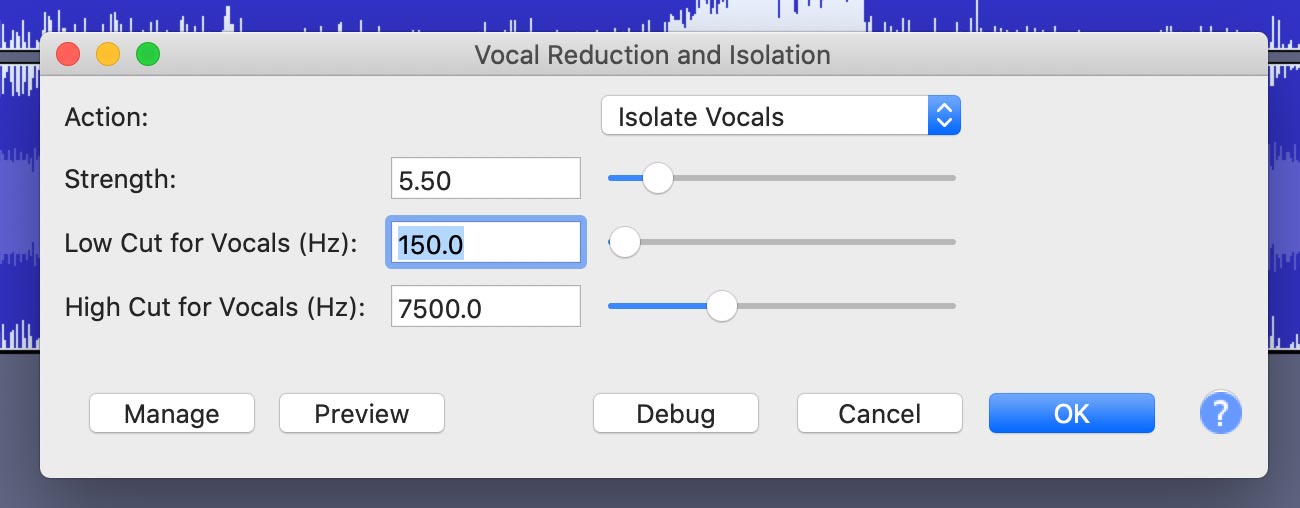
In my case, I chose a medium-high strength of 5.50. Since the song contains a female vocal, I set the low cut slider to remove frequencies below 150Hz, such as kicks drums and bass.
I then set the high cut slider to 7500Hz, to remove sounds like hi-hats and cymbals, above that frequency range.
Keep in mind that there is no single right setting. Working on different songs means needing to use different settings. The best way to get a good result is to carefully listen to the preview as you adjust the settings.
Anyway, once you’re happy with what you hear on the preview, click on OK to process the track.
Your track will be processed with its accompaniment removed, leaving only the vocals in the center, effectively making it an acapella track.
Because the effect will remove a lot of the accompaniment, the resulting track will be low in volume. To make up for the loss in volume, I used the Normalize effect to gain the volume of the track, back to an audible level.
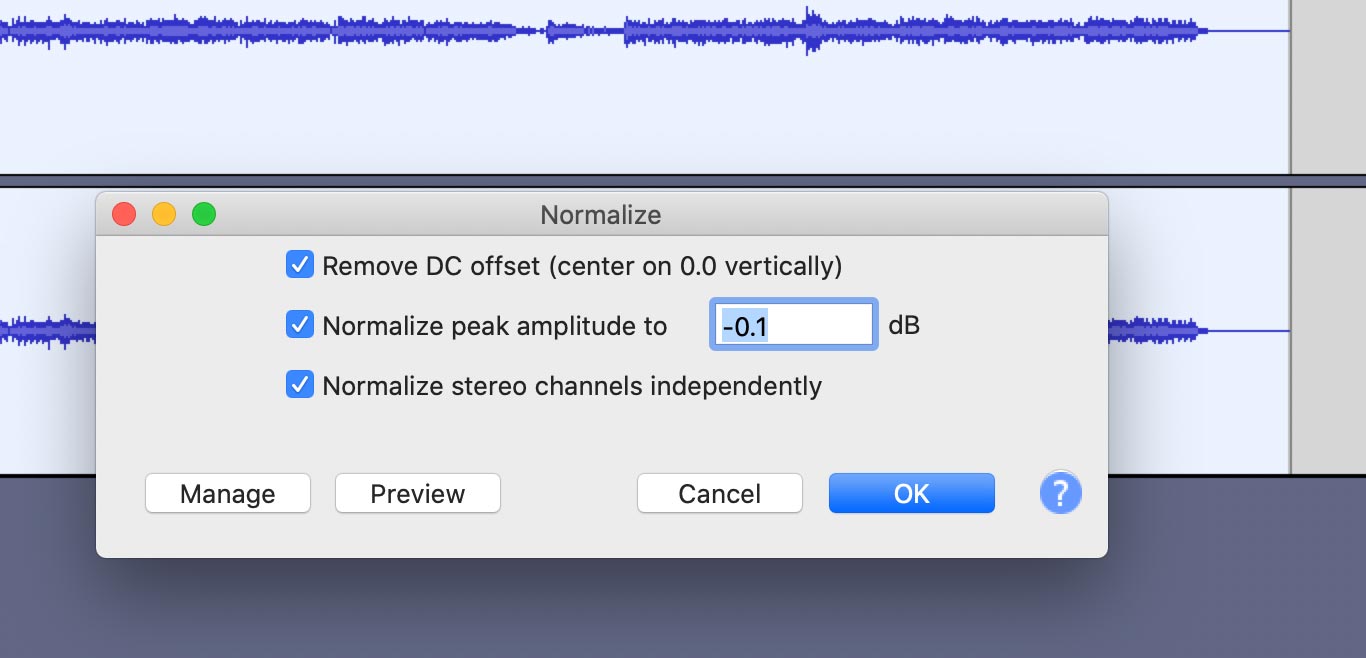
Finally, export the track as an audio file, again preferably in an uncompressed, high-quality audio format such as .wav,
Here’s how my acapella track sounds like:
The caveat to using this method is that you need an instrumental track fully identical to the original song.
You could use PhonicMind to make an instrumental track from a song. However, you’ll see in method 3, why you don’t have to.
For now, I’ll assume you have an identical instrument track for the song you want to isolate vocals from. Let’s get on with the steps.
First import both the instrumental and original track. Place them into separate tracks.
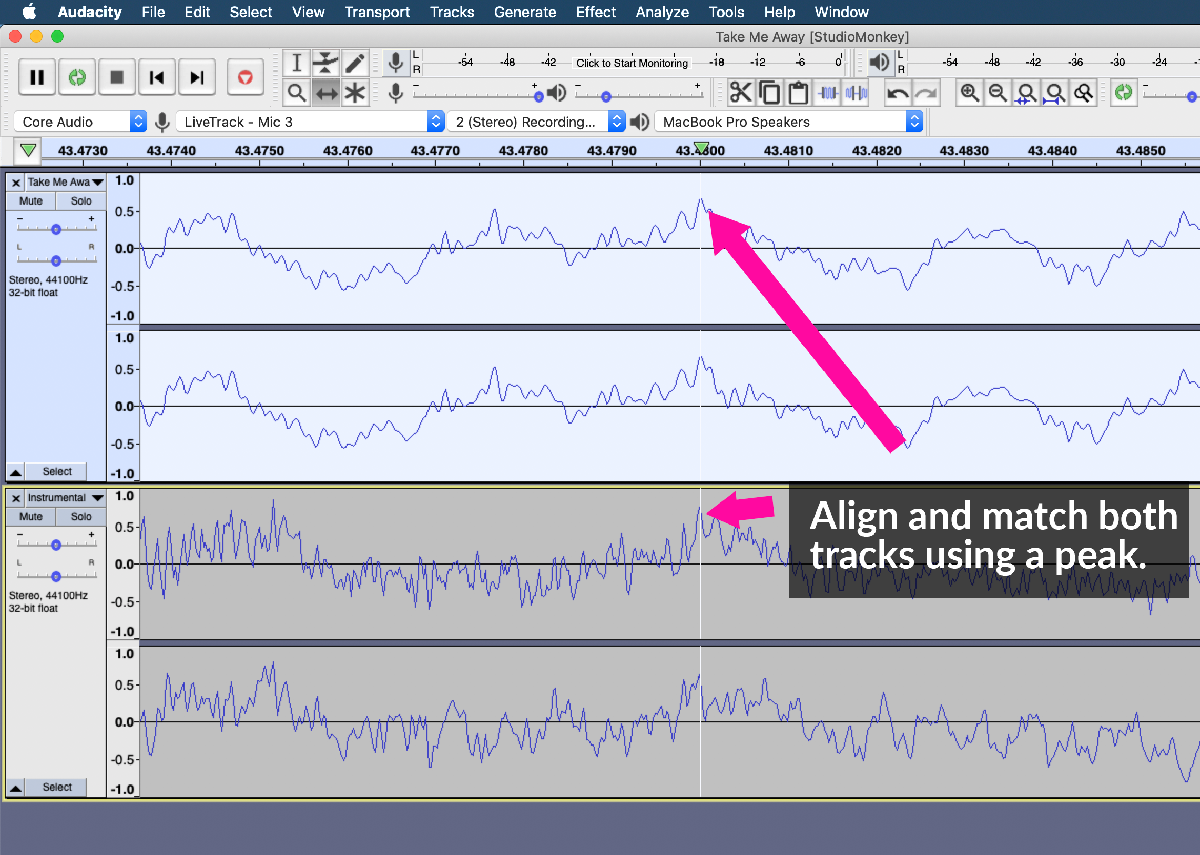
Using the time shift tool, drag the instrumental track and align it to match with the original track.
To align them accurately, pick an audio peak on a track and match it with the other track. Remember, you must match them accurately to get the best results.
Next, invert the instrumental track by selecting it and choosing ‘Invert’, under the Effects drop-bar.
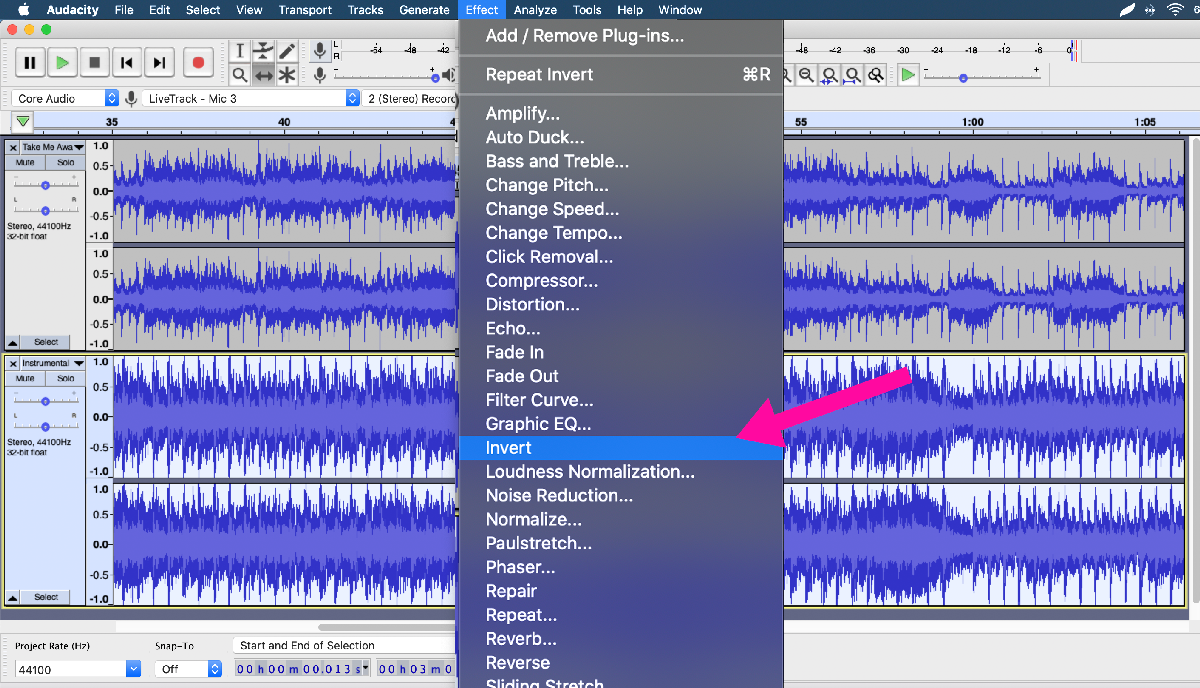
Make sure you only invert one track.
Once done, play the mix and you’ll immediately hear your isolated acapella.
If you’re happy with what you hear, hit CTRL + A to select both tracks, then choose ‘Mix and Render’ under ‘Tracks > Mix’, to mix them down into a track.
Finally, export it as an audio file format of your choice.
Here’s how my final track sounds like:
So far, you may find the two methods above, producing results that are unsatisfactory. Most of the time, the accompaniment can still be heard in the final acapella track.
This is due to the limitations of using standard audio editing techniques to make acapellas from full mixed songs.
This is where PhonicMind, our AI vocal remover comes in, leveraging on the power of artificial intelligence to create amazing-sounding acapellas from any song, regardless of how it’s recorded or mixed.
Let’s go through the steps to using it!
PhonicMind is a vocal remover and audio stems maker. Our AI engine understands music and can separate audio stems from a song.
While it’s often used to create instrumental tracks (karaoke version) and to break a song into audio stems, we can also use it to isolate vocals from any song. Best of all, it takes less than 1 minute to process your song and produce an acapella version for you.
Let me show you how it works.
Head over to PhonicMind.com. Click on ‘Upload’ to upload your song, preferably as a high-quality audio file in a .wav, .flac, or .aiff file format.
You can upload MP3 files, but you’ll get better-sounding acapella tracks if you use higher-quality file formats.
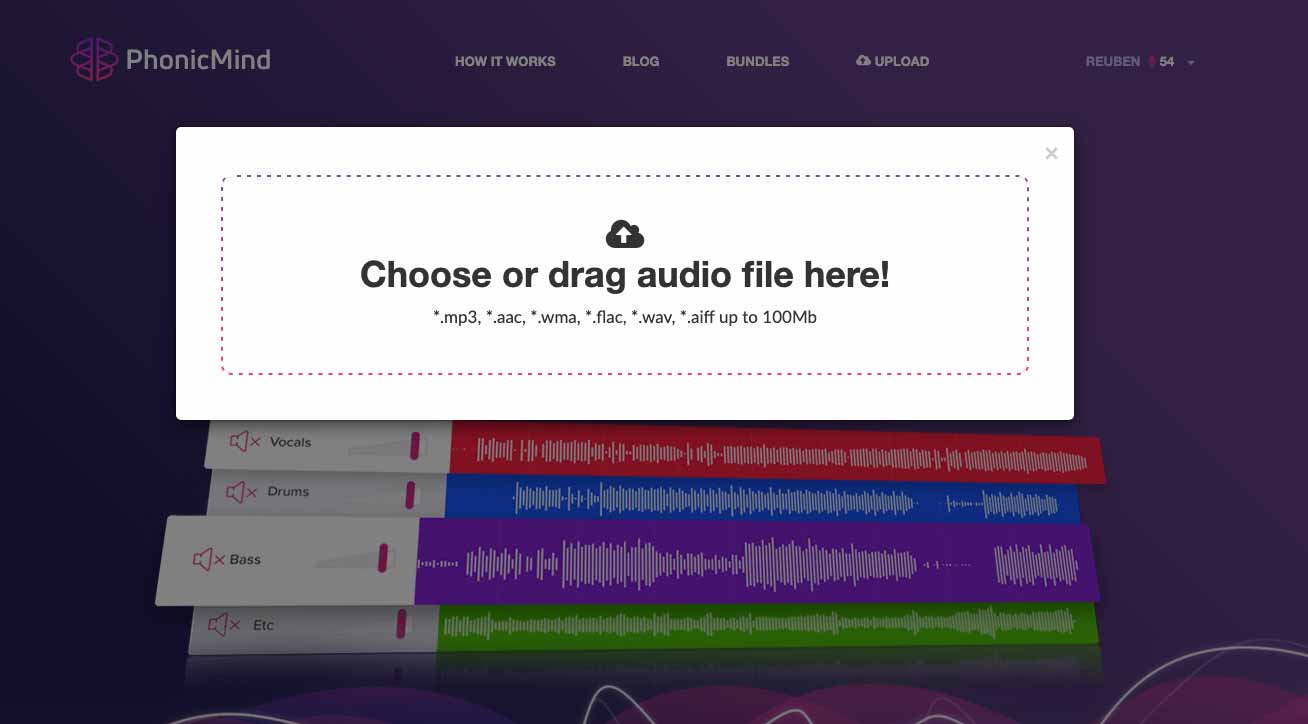
Upon uploading your track, our AI vocal remover will begin to process the song. It’ll take less than a minute to complete.
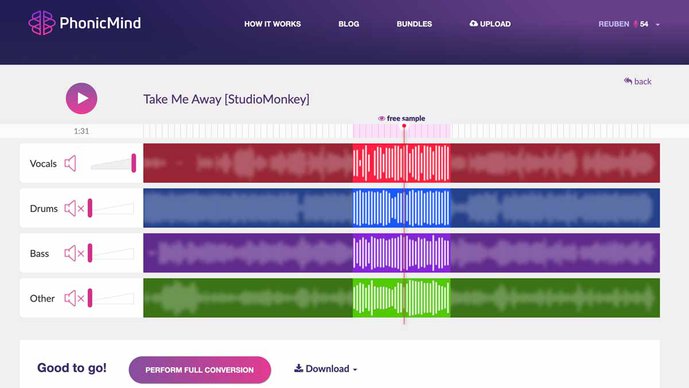
Once done, you’ll be presented with four audio stems, broken down from the song you’ve uploaded. You can immediately preview each of the stems, using the web audio player.
The vocals stem is essentially your acapella track.
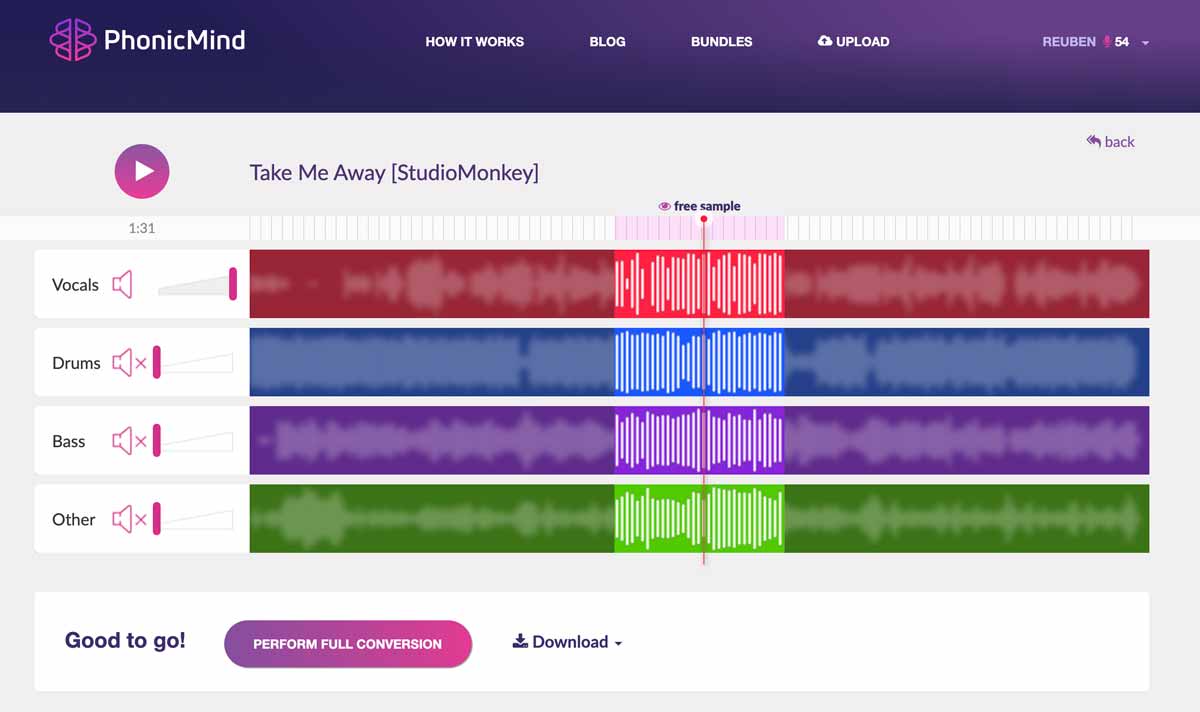
If you like what you hear, click on ‘Perform Full Conversion’ to have PhonicMind process the entire song.
It’ll take another minute and once done, you’ll have options to download a karaoke version of the song, vocals only, or all of the audio stems.
Click on Vocals.flac to download your acapella vocal track. The reason you should .flac over .mp3 format is because .flac is a lossless audio file, meaning that we retain the highest audio quality.
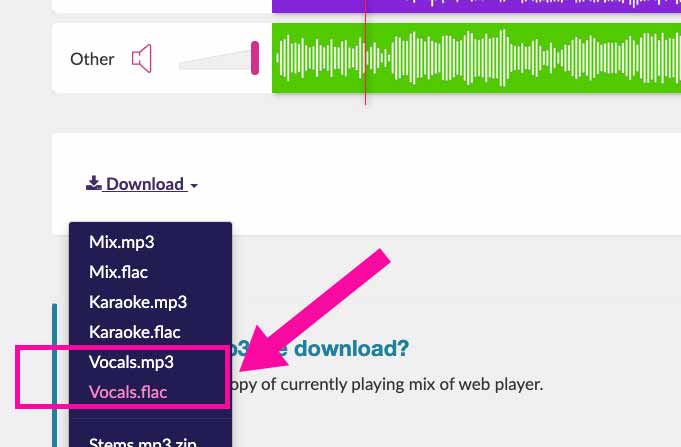
That said, you can also opt to download the acapella vocal track in mp3 if you prefer a smaller file. The files will always remain in your account and you can download them as many times as needed.
Here’s the acapella track from the song, processed with PhonicMind:
Notice the difference in audio quality of the acapellas created using the earlier two methods, versus the acapella processed by PhonicMind.
By now you should be able to create acapella tracks from any song. Using standard audio editing techniques and effects will only get you a sub-par result.
The way forward is to use cutting-edge AI technologies to get great-sounding acapellas from a song.

Audio Mentor
-----
"Music producer and marketer. I create positive change!"