
Is it possible to remove drums from a music track? This is a popular question that you probably wondered about.
While the ability to remove drums from a song used to be near impossible, today, thanks to the accessibility of machine learning and artificial intelligence – removing drums from a song is now possible.
But what’s the reason someone would want to remove drums from a song anyway?
From what we gathered, here are a few popular reasons:
In this post, I want to share three ways to remove drums from a music track.
We’ll start with the first method – where we’ll use an EQ (equalizer) technique and the second method, with a multiband compressor.
Both the EQ and multiband compressor technique isn’t perfect and you might end up with a music track with other instruments removed as well.
However, you’ll learn some good music production techniques along with the steps, so follow along.
Otherwise, if you want the fastest, most efficient way to remove drums from any songs, just skip to method 3.
Let’s get started!
An equalizer (EQ) is an audio engineering tool used to manipulate a music track’s frequency content. So the logic is if we can identify frequencies of the drum elements within a song, we can use the help of EQs to filter them out.
The downside is that in most cases, other instruments within the song sharing the frequencies as the drums will also be filtered out with EQ.
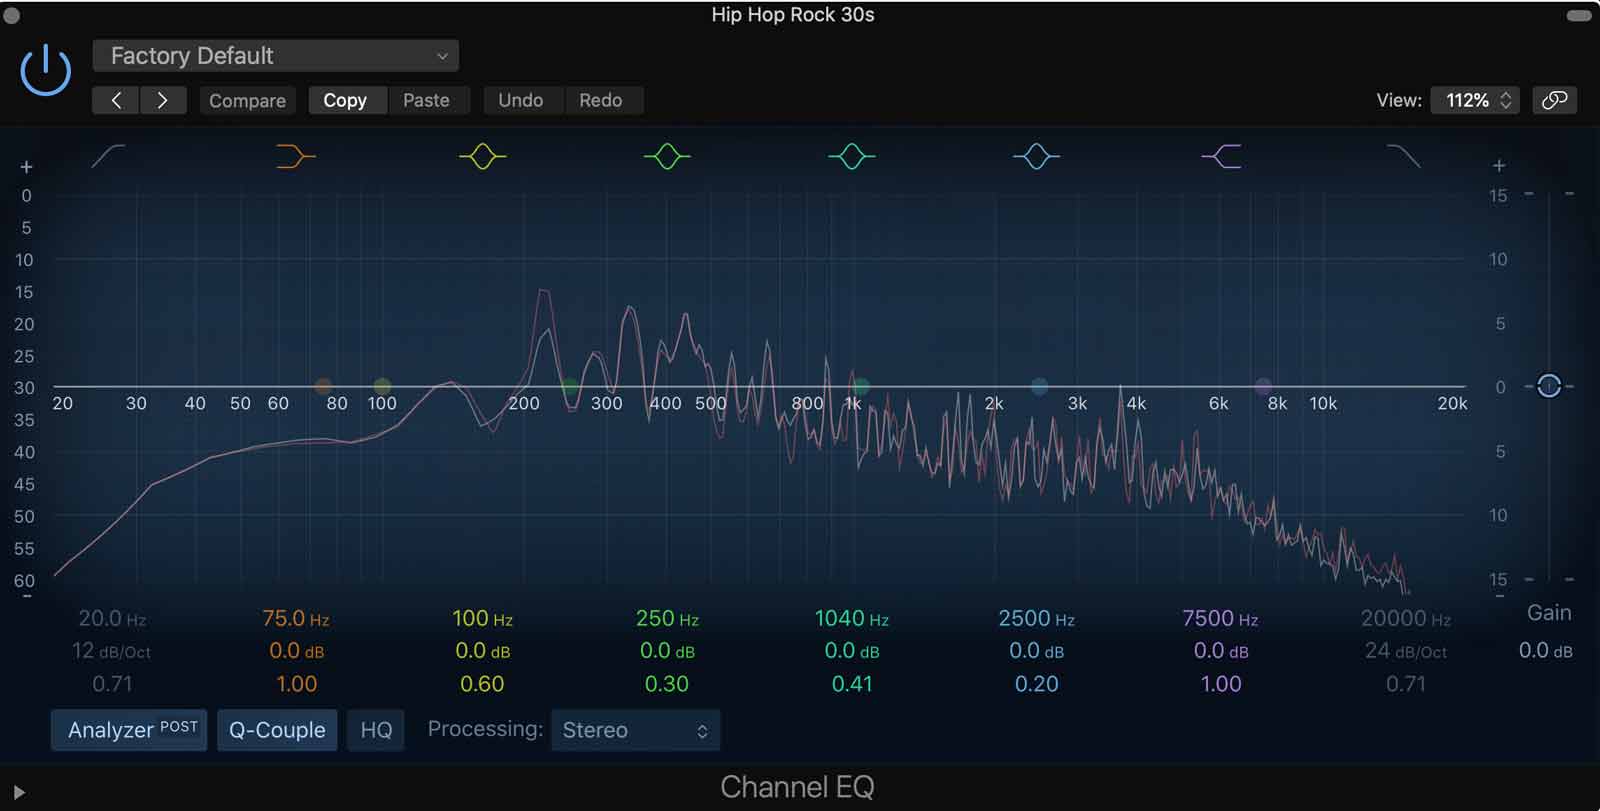
But the good news is that software-based EQ effects are readily available to us in most audio editing software or Digital Audio Workstations (DAW) – such as Audacity (free, open-source), Adobe Audition, Logic Pro, Cubase, and Studio One.
As long as you can get hold of an audio software with an EQ effect, the steps are fundamentally similar. So let’s continue.
Before doing any sort of equalization, first, identify the frequencies of the drum elements within a song – like a snare, kick, hi-hats and cymbals.
Audio frequencies are measured in Hertz (Hz).
Here is a general guideline for drum frequencies:
As you can see, a typical drum kit covers a wide frequency range, thus making isolating drums with EQ-ing, a difficult task.
Keep in mind that the guideline above is merely a general guide. The frequencies of drums differ from song to song, depending on how it’s recorded. So, it’s always better to trust your ears more.
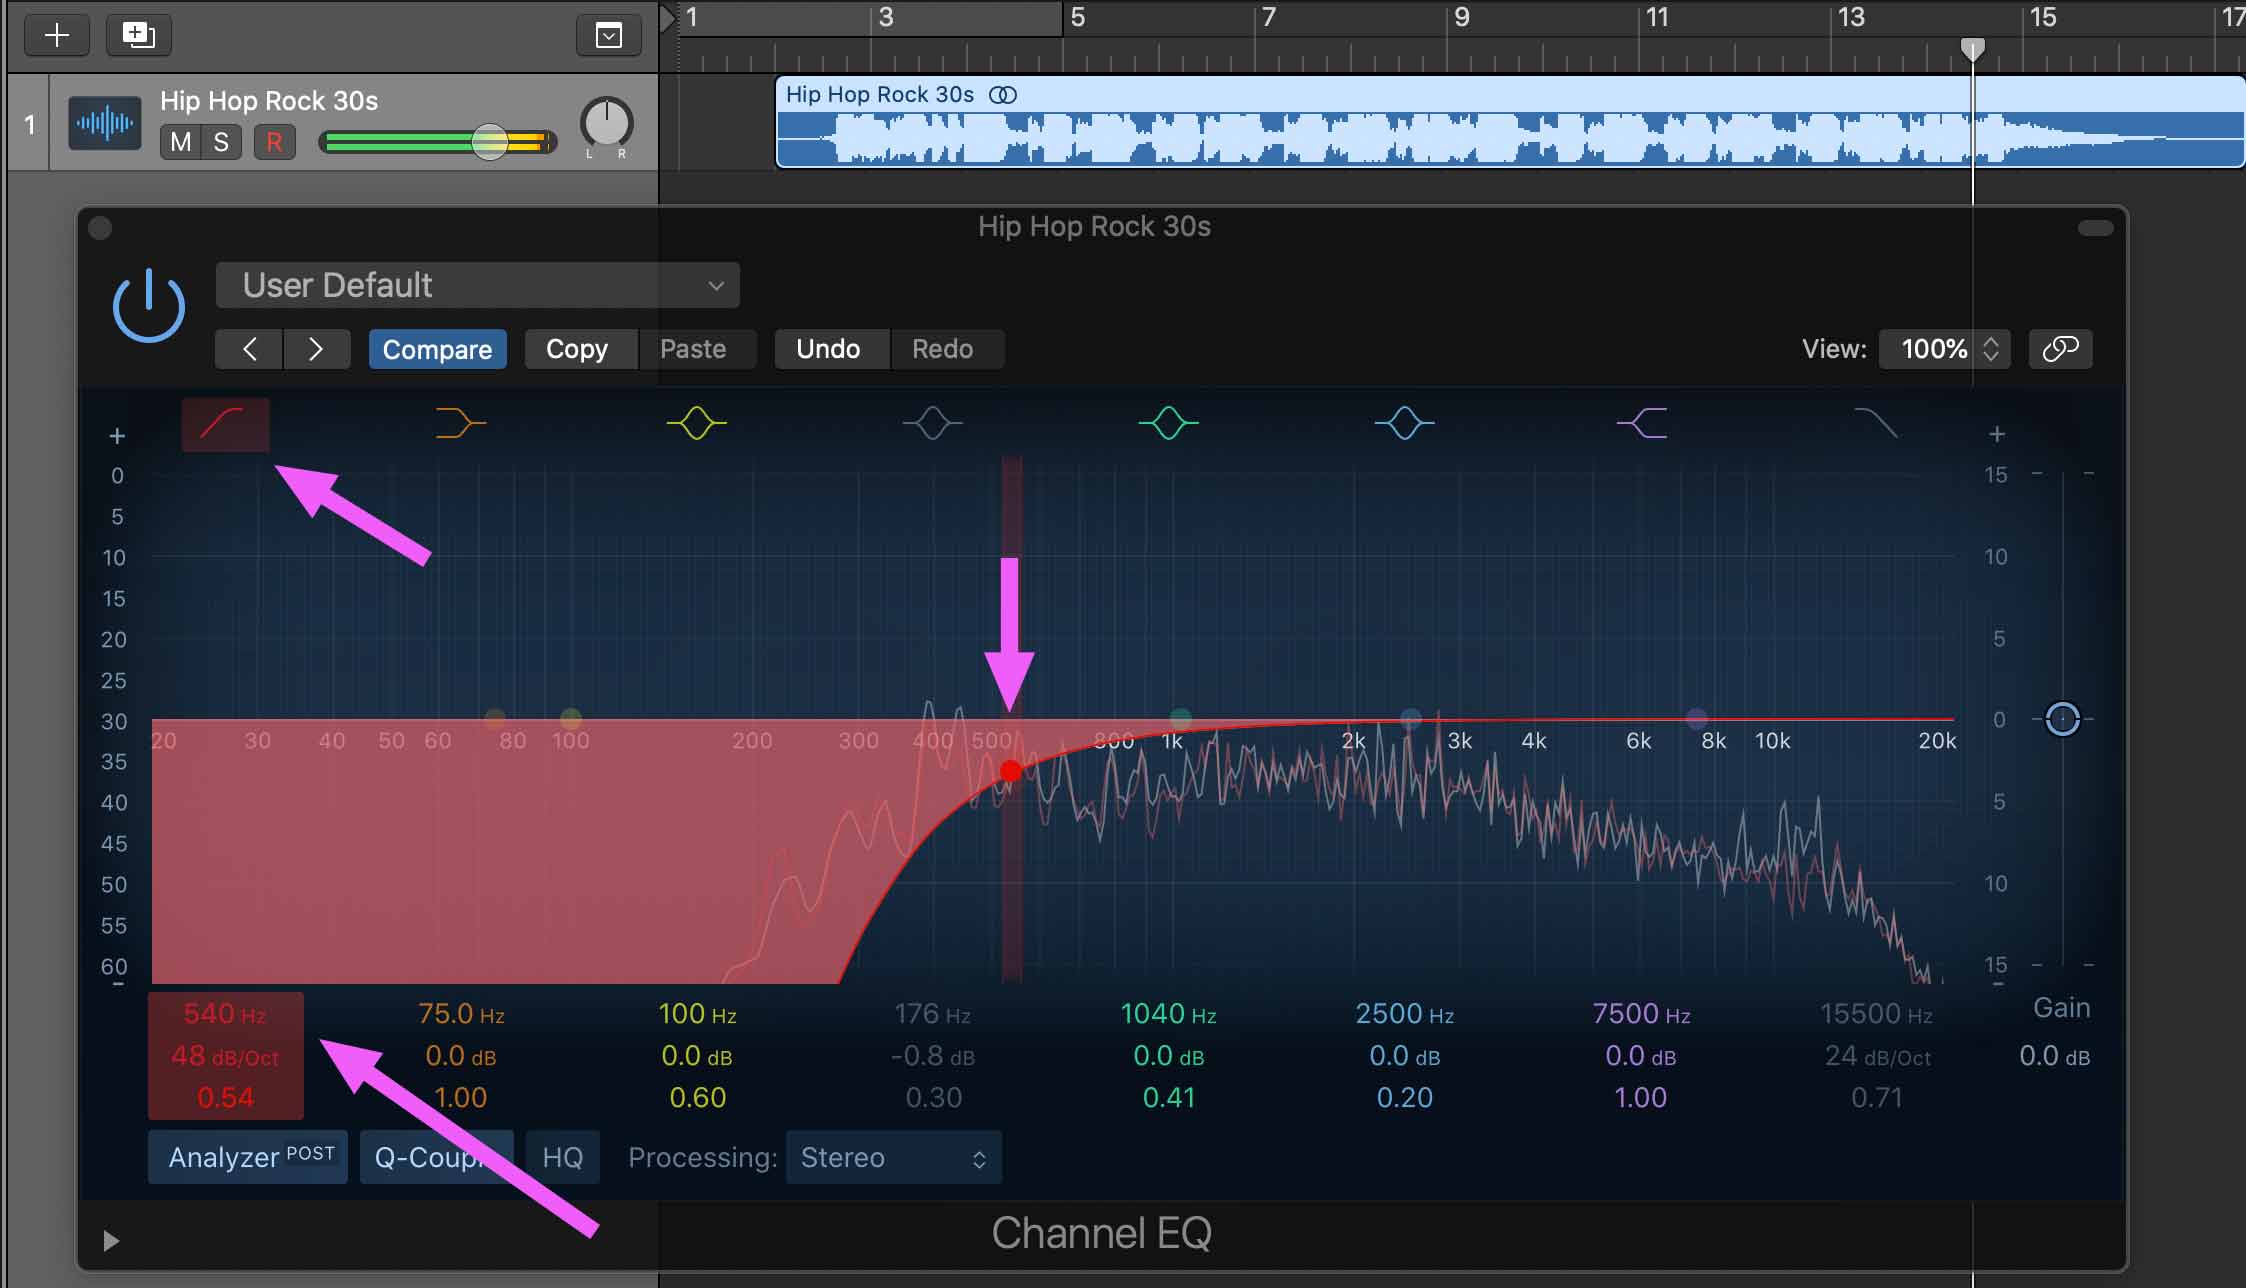
A high-pass filter (LCF) is a good start to filtering out drums in a music track.
In this example, I’m using Logic Pro’s Channel EQ, a multiband equalizer that includes a low-pass and high-pass filter – exactly what we needed.
Note: A high-pass and a low-cut filter are essentially the same things. You can also use single-band or DJ EQs, which have the same function.
With equalizers, you normally have a few crucial settings:
Using the low-cut filter, I filtered the EQ from around 540Hz, setting a steep slope of 48 dB per octave with a high Q-factor. I had to use a steep slope because there were lots of drum elements in the low-end of the song I chose for this example.
Watch the video below to listen to the track before and after EQ-ing:
You’ll hear that we have reduced the drum kicks by a bit, however, the snares and hi-hats are still present in the song.
You may also notice that the bass and lower-end frequency content are also filtered out along with the kick drums.
A multiband EQ gives us more control over what to filter. Instead of just using a high-pass filter, we’re going to refine by additionally targeting some extra frequencies we want to reduce.
With the same EQ which also acts as a multiband EQ on Logic Pro, I shifted the frequency of the high-pass filter to around 400Hz to give some room. Then I added a few bell filters at the 2kHz, 5kHz, and 11kHz mark – targeting the snares and hi-hats.
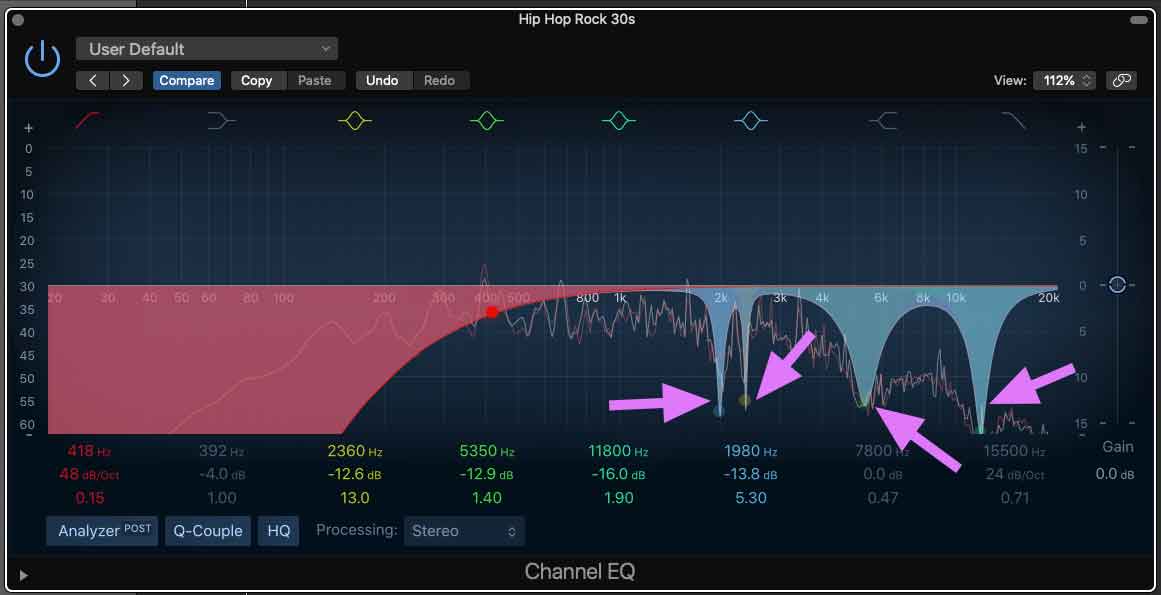
The result is a slightly cleaner-sounding song with the drums reduced, but again, not entirely removed.
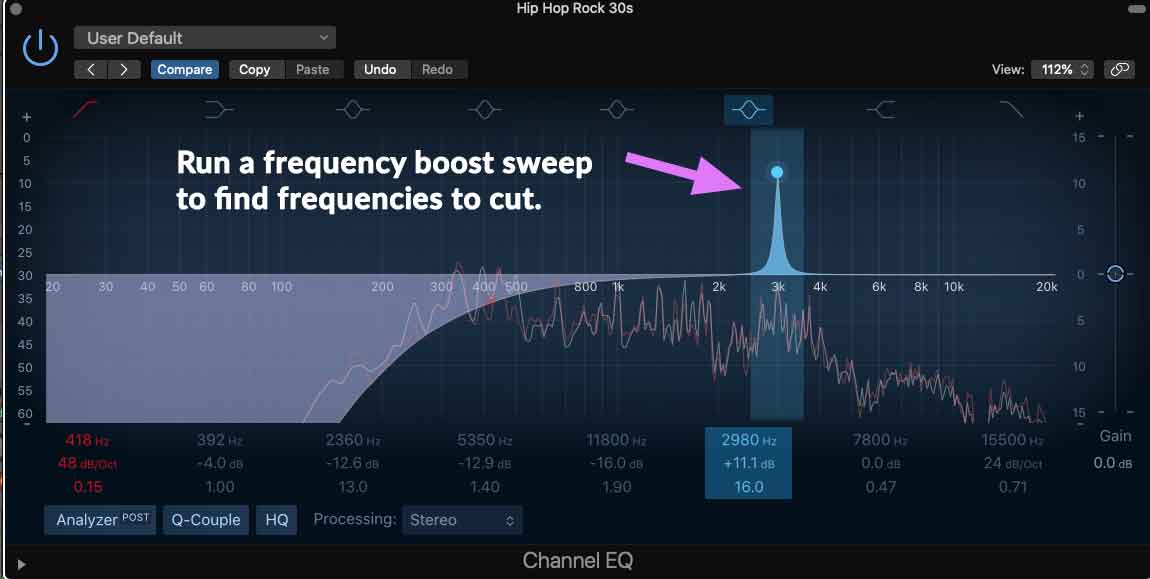
If you’re wondering, which frequencies to cut depends on the song we’re working on. Rather than following a set of frequency guidelines, it’s better to do careful listening as you filter out the drum elements from your song.
A good technique to find frequencies to cut is the ‘boost & sweep’ technique – where you boost a frequency band, slowly sweep it through the EQ spectrum to find prominent drum frequencies, and once you do, reduce them by pulling the frequency down.
Now that you know how to use an equalizer, let’s move on to using a multiband compressor to remove drums from a song.
A multiband compressor is a compressor and an equalizer fused together. When we use equalizers, we essentially filter out frequencies. A compressor on the other hand, ‘compresses’ the sound’s dynamic range.
And with a multiband compressor, we can select the frequencies to do downward compression – that is, to attenuate signals at selected frequencies. In our case, this would be the frequencies of the drum elements.
Most audio software and DAWs have multiband compressor effects included. In Logic Pro, I simply loaded the multipressor effect.
Some important parameters you’ll find on multiband compressors are:
Targeting two frequency ranges – from 0hz - 550Hz and 1kHz - 2kHz, I set a low threshold of -45dB and dialed in a rather high compression ratio of 21:1.
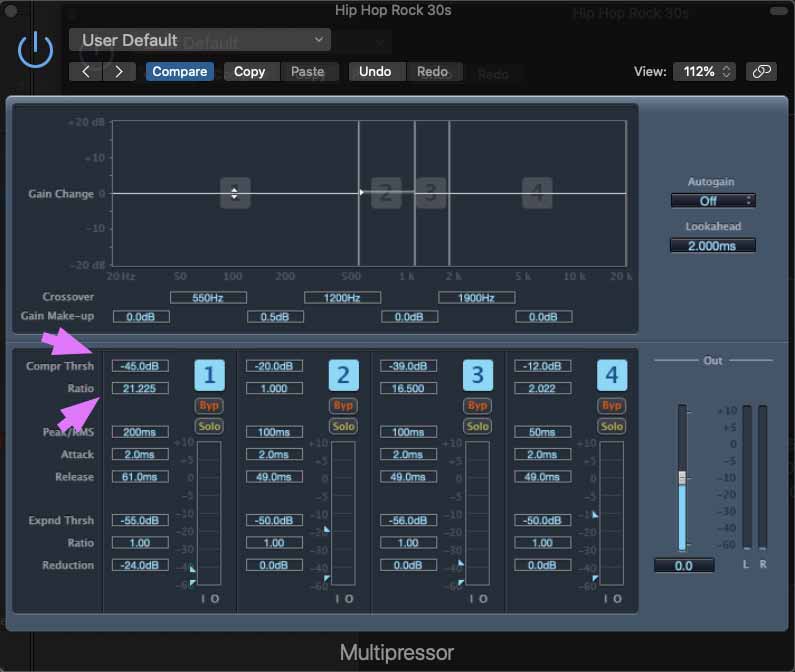
This ensures the compressor only compresses the frequency ranges I selected.
Because Logic Pro’s multiband compressor only allows up to 4 frequency bands, I added another Multipressor effect, so I can target another frequency range to compress.
The hi-hats in my song example were quite prominent, so I tried attenuating them by compressing a high-frequency range between 5kHz - 20kHz.

To help the multiband compressor and to achieve a more desirable outcome, I added an EQ with a high-pass filter.
Here’s what the song sounds like before and after the multiband compressors:
If you’ve followed till here so far, you might think that even with all the EQ-ing and compression work done, our music track isn’t where we’d want it to be.
And you are right!
You can still hear the drums in the song. And if we apply are more aggressive EQ or compression, we end up losing other instrumental elements of the song.
Luckily, there’s a more effective way to remove drums from a song. And this is a method that produces the cleanest and best-sounding result.
Having started as a vocal remover a few years ago, today – we’ve turned PhonicMind into an AI-powered stem maker that enables you to create stems out of any song.
The AI engine behind PhonicMind understands music and can separate vocals, drums, bass, and other instruments from a music track. This means we’re able to remove drums from a song and only keep the elements that we want.
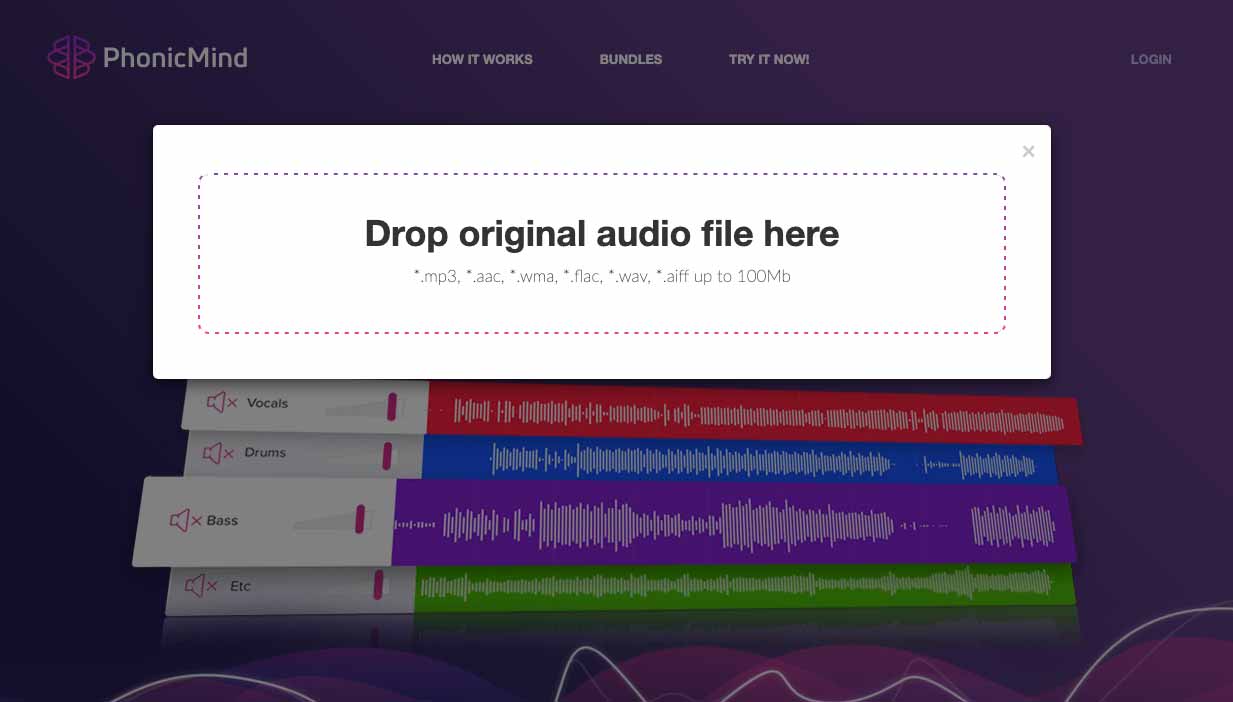
On PhonicMind, click ‘Let’s Go’ to start, and drop your song into the pop-up window to upload. It’s that simple.
Using a high-quality audio file such as .wav, .aiff or .flac is preferred. But it’s fine if you only have an mp3 version of your song.
Depending on your song and file size, it’ll take no more than a minute for PhonicMind to analyze, process, and create stems out of the song.
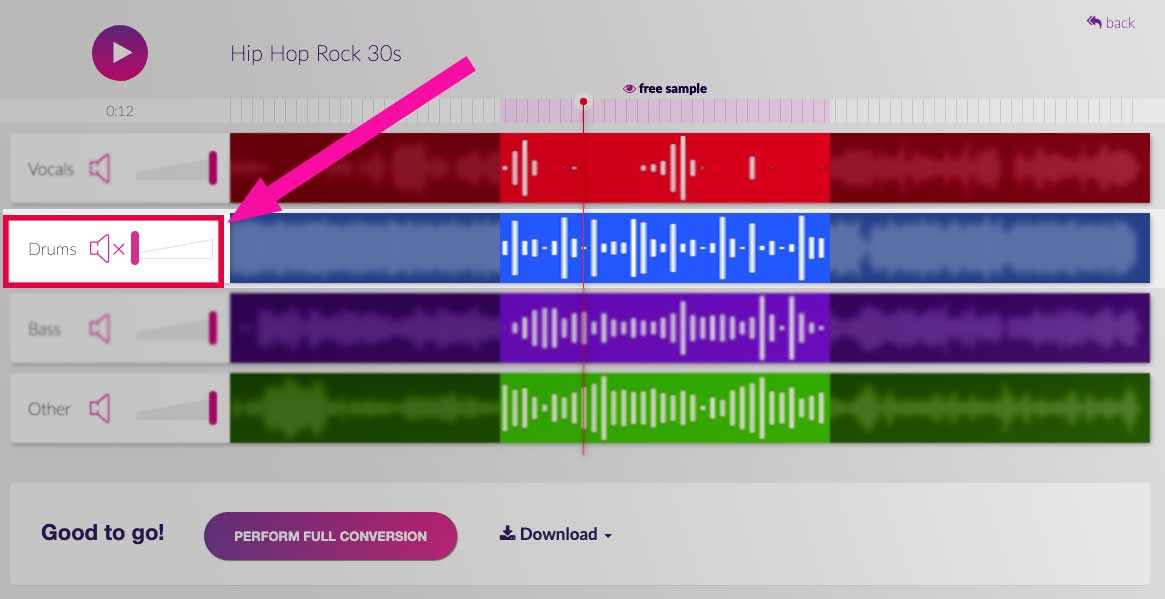
Once done, you’ll find a mixer that you can use to playback a 30-seconds preview of the stems – vocals, drums, bass, and other.
Since we’re removing drums, choose to mute the drum stem – and hit the play button to preview the song with its drums removed!
And that’s it! You would be listening to a song without drums.
If you prefer, instead of completely muting the drum stem, you can also dial back a little volume on the drums and mix it with the other stems. This can sometimes help your song sound more natural.
Happy with how everything sounds? Click on ‘Perform Full Conversion’ to allow PhonicMind to process the entire song.
Processing the whole song will take a slightly longer time (under 5 minutes), so sit back and relax while it processes.
Once complete, you can still toy around with the web player – to either mute the drum stem or leave a little bit of its sound in the mix (to retain some naturalness).

When you’re ready, click download. You’ll find a few options under download – Mix, Karaoke, Vocals, and Stems.

Here are what each of them means:
Whether to download the .flac or .mp3 audio file format, depends on whether you want a lossless audio file at its highest quality (.flac) or you prefer a smaller, compressed audio file (.mp3).
In my case, since I want a version of the song without the drums, I muted the drum stem – and chose to download Mix.mp3.
Here’s how the final output sounds, using PhonicMind to remove drums:
In the video example, I mixed a little of the drum sound back using the web player to keep the song sounding more natural. However, it’s up to you, whether to remove the drums completely or to retain a little in your song!
Note: There are no download limits once you have processed a song. So download away!
I hope this guide on removing drums from songs and samples has helped you.
While our stem maker makes it effortless to remove drums, you can always go a step further to creatively shape your sound by using the equalization and compressions techniques explained above, after processing it with PhonicMind.
Go forth, remove drums from songs and get creative!

Audio Mentor
-----
"Music producer and marketer. I create positive change!"